Stuck with a flat tire and no bike shop nearby? Good news: most flats are simple fixes you can handle with a few basic tools and a little confidence.
A punctured tube, loose valve, or sneaky piece of glass can ruin a ride fast-but it doesn’t have to end your day. Learning to repair it yourself saves time, money, and the hassle of walking your bike home.
This guide walks you through how to find the leak, remove the wheel, patch or replace the tube, and get rolling again safely. No mechanic required.
How to Identify the Cause of a Flat Bike Tire Before You Start Repairs
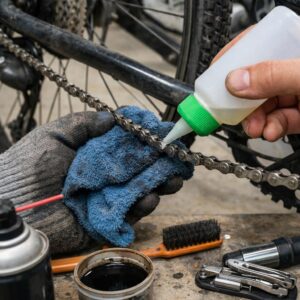
Before you pull out tire levers or install a new bike inner tube, find out why the tire went flat. This saves money on replacement parts and prevents the same puncture from ruining your next ride. A simple inspection with a Park Tool tire lever, hand pump, and a bucket of water can usually tell you what happened.
Start by checking the outside of the tire while it is still on the wheel. Look for glass, thorns, metal wire, sidewall cuts, or a worn tread with exposed threads. In real-world repairs, I often see commuters patch a tube only to miss a tiny staple still buried in the rubber, causing another flat within minutes.
- Single small hole: usually caused by a thorn, nail, glass shard, or road debris.
- Two matching slits: often a pinch flat from hitting a curb or pothole with low tire pressure.
- Leak near the valve: may mean a damaged valve stem, poor installation, or the tube shifted inside the rim.
Remove the tube carefully and keep it aligned with the tire so you can match the puncture location to the tire casing or rim. Inflate the tube slightly and listen for air, or submerge it in water and watch for bubbles. If the hole lines up with the rim side, inspect the rim tape; a sharp spoke hole can puncture even a brand-new tube.
Also check tire pressure habits before blaming the tube quality. Underinflated tires are more likely to pinch, while overinflated tires can worsen damage on cracked or aging rubber. If the tire has deep cuts, bulging sidewalls, or repeated flats, replacing the bicycle tire is safer than relying on another patch kit.
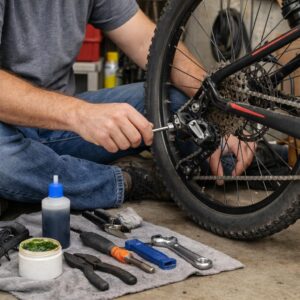
Step-by-Step Guide to Patching or Replacing a Bike Inner Tube at Home
Start by removing the wheel and fully deflating the tube. Use tire levers, such as Park Tool TL-1.2 Tire Levers, to lift one side of the tire bead off the rim without scratching the wheel. Pull out the inner tube, but keep its position aligned with the tire so you can match the puncture to the exact spot inside the tire.
Inflate the tube slightly and listen for air escaping, or dip sections in water to find bubbles. In real-world repairs, I often find tiny glass shards still stuck in the tire casing, especially after city commuting. Remove anything sharp before installing a patch or new tube, or the replacement will fail within minutes.
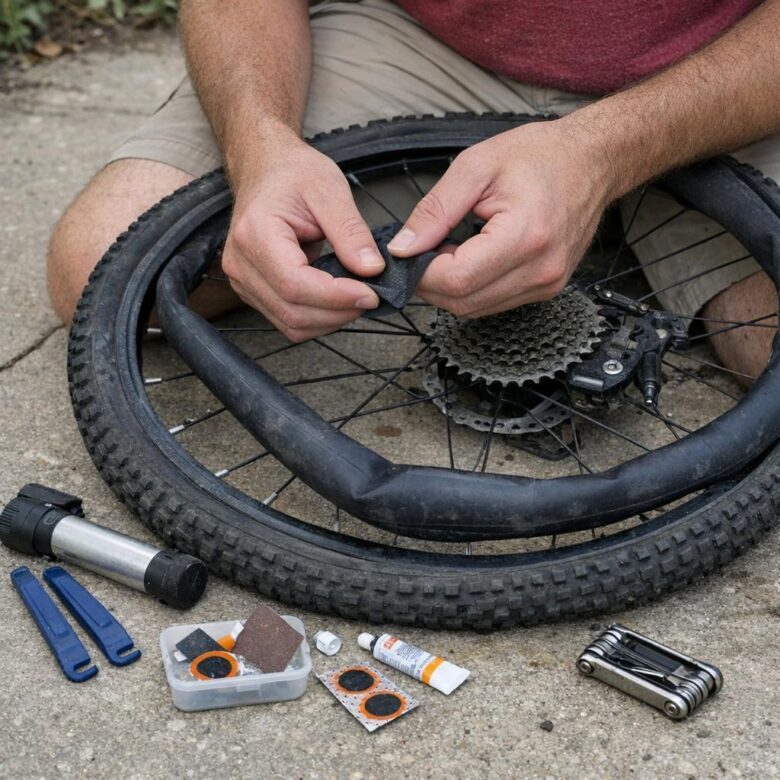
- For a small hole, roughen the tube with sandpaper, apply vulcanizing glue, wait until tacky, then press on the patch firmly.
- For a torn valve stem or long split, use a replacement inner tube instead of a patch.
- Check the tire sidewall for cracks or bulges; a damaged tire may need replacement, not just tube repair.
Before reinstalling, add a little air to the patched or new tube so it holds shape. Seat it inside the tire evenly, then push the tire bead back onto the rim by hand when possible. Avoid using a screwdriver, as it can pinch the tube and create another flat.
Finally, inflate with a portable bike pump or floor pump and confirm pressure with a digital pressure gauge. Staying within the PSI printed on the tire improves ride quality, reduces pinch flats, and helps avoid unnecessary bike repair shop costs.
Common Flat Tire Repair Mistakes That Lead to Repeat Punctures
One of the biggest mistakes is patching the tube without finding what caused the puncture. Run your fingers carefully inside the tire casing and check the rim strip, because a tiny glass shard, wire, or exposed spoke hole can ruin a fresh repair within minutes.
I’ve seen commuters replace a tube outside an office building, inflate it with a portable air pump, and get another flat two blocks later because a staple was still embedded in the tread. A good bike tire repair kit, such as Park Tool GP-2 patches with tire levers, helps, but only if you inspect the tire properly before reinstalling the tube.
- Pinching the tube: Forcing the tire bead on with metal tools can trap the tube and create a snake-bite puncture.
- Skipping pressure checks: Underinflated tires increase pinch flats, while overinflation can stress worn sidewalls. Use a digital tire pressure gauge for accuracy.
- Ignoring tire wear: If the tread is thin or cracked, repeated flats may cost more than replacing it with puncture-resistant tires.
Another common issue is using sealant or a patch on a dirty, wet tube. Sand the area lightly, let the glue become tacky, and press the patch firmly; rushing this step often causes slow leaks that look like new punctures.
If you keep getting flats on the same wheel, compare the repair cost with a new rim tape, quality inner tube, or upgraded commuter tire. Sometimes the cheapest fix is replacing the weak part instead of paying for repeated bicycle repair service visits.
Summary of Recommendations
Fixing a flat at home is less about mechanical talent and more about having the right kit, a little patience, and knowing when a tube or tire is no longer worth saving. If the damage is small and the tire casing is sound, repair it confidently. If you see large cuts, repeated punctures, cracked rubber, or a damaged rim, replace the part before your next ride.
- Keep levers, a spare tube, patches, and a pump ready.
- Inspect the tire carefully before reinstalling it.
- Choose safety over squeezing extra life from worn parts.

Dr. Sterling Brooks is a Doctor of Mechanical Engineering (PhD) and a high-performance cycling consultant. He specializes in bicycle kinematics and structural integrity, applying advanced engineering principles to simplify complex bike maintenance. His mission is to provide cyclists with the technical expertise needed to ensure their gear is as efficient and reliable as the athletes who ride them.