Is your bike quietly becoming harder, slower, and less safe to ride?
Most beginner bike problems start small: a dry chain, soft tires, loose bolts, worn brake pads. Left alone, they turn into noisy rides, expensive repairs, or breakdowns far from home.
The good news is that basic bike maintenance is simple once you know what to check, when to check it, and which tools actually matter. You do not need a workshop-just a few habits and a little confidence.
This guide will show you how to maintain a bike at home, from cleaning and lubrication to tire pressure, brakes, gears, and safety checks before every ride.
Bike Maintenance Basics: Essential Tools, Safety Checks, and Why Regular Care Matters
Basic bike maintenance at home starts with a few reliable tools and a simple routine. You do not need a full workshop, but a good floor pump with pressure gauge, tire levers, chain lubricant, hex keys, and a quality multitool like the Park Tool AWS-10 can handle most beginner repairs and adjustments.
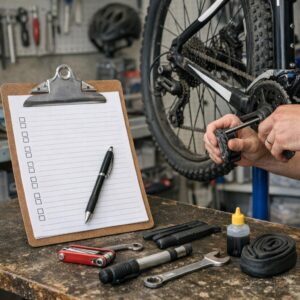
Before every ride, do a quick safety check: squeeze both brakes, spin the wheels to look for rubbing, check tire pressure, and make sure the chain moves smoothly. A real-world example: if your rear tire feels slightly soft before a commute, inflating it to the recommended PSI can prevent pinch flats, poor handling, and unnecessary tire replacement cost.
- Tires: Check pressure, cracks, and embedded glass or debris.
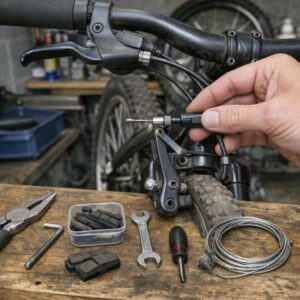
- Brakes: Make sure pads contact the rim or rotor evenly.
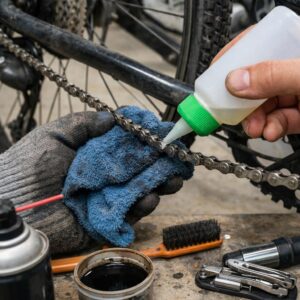
- Drivetrain: Wipe and lubricate the chain when it looks dry or noisy.
Regular care also protects more expensive components. A dirty chain can wear out the cassette and chainrings faster, turning a low-cost bottle of bike chain lube into serious long-term savings on bike repair services.
From experience, most “mystery noises” on beginner bikes come from dry chains, loose bolts, or underinflated tires-not major mechanical failure. Spending five minutes each week with basic bicycle maintenance tools keeps the ride safer, smoother, and cheaper to own.
How to Maintain a Bike at Home: Cleaning, Lubricating, Tires, Brakes, and Chain Care
Start with a basic bike cleaning routine: use a bucket of warm water, mild bike cleaner, a soft brush, and a microfiber cloth. Avoid blasting the hubs, bottom bracket, or headset with a high-pressure hose, because it can push water into bearings and lead to expensive bicycle repair costs later.
Clean the drivetrain first if the chain looks black or gritty. A chain-cleaning tool like the Park Tool CM-5.3 Cyclone Chain Scrubber makes the job faster, but an old toothbrush and degreaser can still work well for home bike maintenance.
- Wipe the chain dry before applying bicycle chain lubricant.
- Use wet lube for rainy commutes and dry lube for dusty roads.
- Remove excess lube after 5-10 minutes to prevent dirt buildup.
Check tire pressure at least once a week with a floor pump that has a pressure gauge. For example, if your hybrid bike feels slow on the way to work, the issue may simply be underinflated tires, not a mechanical problem.
Inspect the brakes before every longer ride. Squeeze each brake lever: it should feel firm, not spongy, and the brake pads should contact the rim or rotor evenly without rubbing while you pedal.
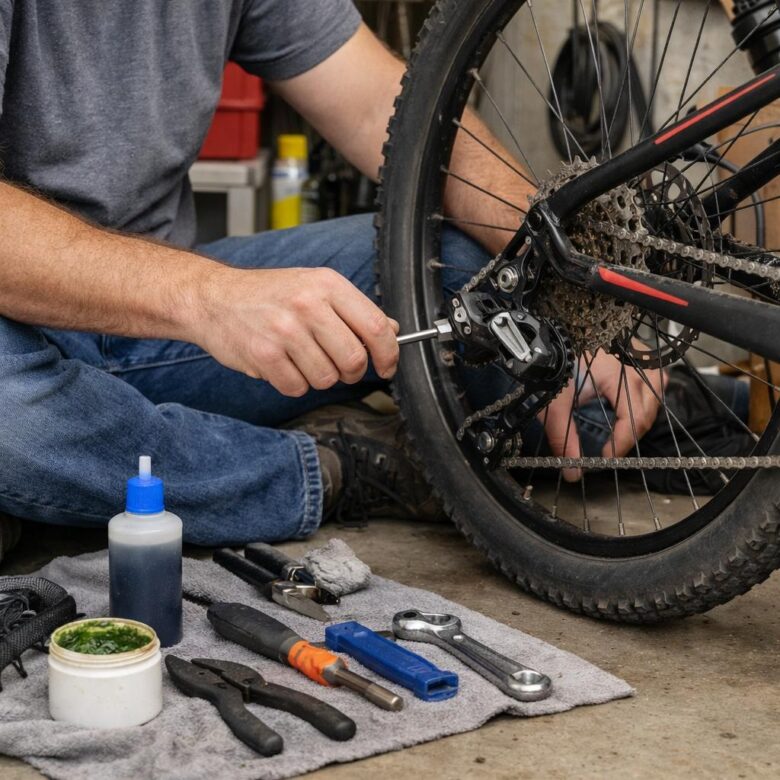
Finally, look over the chain, cassette, and brake pads for wear. If the chain skips under pressure or the brake pads are thin, replacing parts early is usually cheaper than damaging the drivetrain or needing a full bike shop service.
Common Beginner Bike Maintenance Mistakes and How to Prevent Costly Repairs
One of the most expensive beginner mistakes is riding with a dry or dirty chain. A neglected drivetrain wears the cassette and chainrings faster, turning a simple chain lube job into a much higher bike repair cost. Use a chain checker, such as the Park Tool CC-4 Chain Wear Indicator, and replace the chain before it stretches too far.
Another common issue is over-tightening bolts, especially on stems, seatposts, and carbon bike parts. I’ve seen riders crack a carbon seatpost clamp by “just giving it one more turn,” when a small torque wrench would have prevented the damage. If your bike has carbon components, a quality torque wrench is not optional.
- Ignoring brake rub: Minor disc brake rubbing can become uneven pad wear or rotor damage. Check alignment before every few rides.
- Using the wrong lubricant: Heavy oil attracts grit and turns into grinding paste. Use wet lube for rain and dry lube for dusty roads.
- Skipping tire pressure checks: Low pressure increases puncture risk and sidewall damage, especially on commuter bikes and e-bikes.
Beginners also tend to adjust derailleurs too aggressively. If shifting suddenly gets worse after a cable tweak, stop and check hanger alignment, cable tension, and limit screws before forcing more adjustments. For persistent shifting problems, paying for a professional bike service can be cheaper than replacing a damaged derailleur.
A simple home setup with tire levers, a floor pump with pressure gauge, hex keys, and a basic repair stand makes routine bicycle maintenance safer and more accurate. Good tools reduce guesswork. That is what prevents small maintenance errors from becoming costly repairs.
Expert Verdict on How to Maintain a Bike at Home: A Complete Beginner’s Guide
Good bike maintenance is less about mechanical talent and more about consistency. Start with the simple habits you can repeat confidently: keeping the chain clean, checking tire pressure, listening for unusual noises, and inspecting brakes before rides.
Practical takeaway: if a task feels safe, simple, and low-risk, learn it at home. If it affects braking, steering, wheel alignment, or drivetrain precision and you feel unsure, let a professional handle it. A well-maintained bike rides smoother, lasts longer, and gives you fewer surprises on the road or trail.

Dr. Sterling Brooks is a Doctor of Mechanical Engineering (PhD) and a high-performance cycling consultant. He specializes in bicycle kinematics and structural integrity, applying advanced engineering principles to simplify complex bike maintenance. His mission is to provide cyclists with the technical expertise needed to ensure their gear is as efficient and reliable as the athletes who ride them.