Are your brakes slowing you down-or quietly putting you at risk?
A small brake issue can turn a smooth ride into a dangerous one fast: rubbing pads, spongy levers, weak stopping power, or that awful squeal every time you slow down.
This guide breaks down the most common bike brake problems and the easy adjustments that fix them, whether you ride rim brakes, mechanical discs, or hydraulic discs.
With a few simple checks and the right tweaks, you can restore clean braking, improve control, and ride with more confidence.
Bike Brake Basics: How Pads, Cables, Rotors, and Calipers Affect Stopping Power
Good bike brake adjustment starts with understanding what actually creates stopping power. Brake pads provide friction, cables or hydraulic lines transfer force, rotors or rims create the braking surface, and calipers control how evenly the pads contact that surface. If one part is worn, dirty, or misaligned, the whole system feels weak.
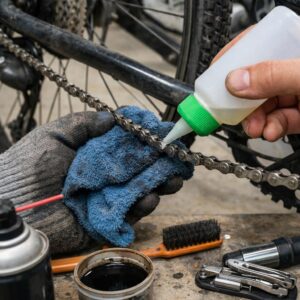
Brake pads are usually the first place to check. Glazed pads look shiny and hard, while contaminated pads may feel slippery or squeal after contact with chain lube, road grime, or bike wash products. In a workshop setting, I often see riders replace cables when the real issue is a cheap set of worn pads that can no longer bite properly.
- Brake pads: Replace if the grooves are gone, the surface is glazed, or braking feels weak even after adjustment.
- Cables and housing: Friction, rust, or frayed strands can make mechanical disc brakes and rim brakes feel spongy.
- Rotors and calipers: A bent rotor or off-center caliper can cause rubbing, pulsing, and uneven braking.
For disc brakes, rotor condition matters as much as pad condition. Clean rotors with isopropyl alcohol and a lint-free cloth, then check for wobble while spinning the wheel. A small rotor rub can often be fixed with a Park Tool rotor truing fork, but badly warped rotors are usually better replaced than fought with.
Hydraulic brakes add another factor: fluid pressure. If the lever pulls close to the handlebar or feels inconsistent on descents, the system may need a brake bleed service rather than a simple adjustment. The benefit is clear: properly serviced brakes reduce stopping distance, improve control, and make daily commuting or trail riding much safer.
How to Adjust Bike Brakes Step by Step for Rim, Disc, and V-Brake Systems
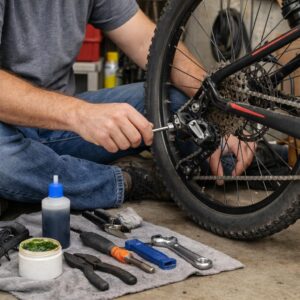
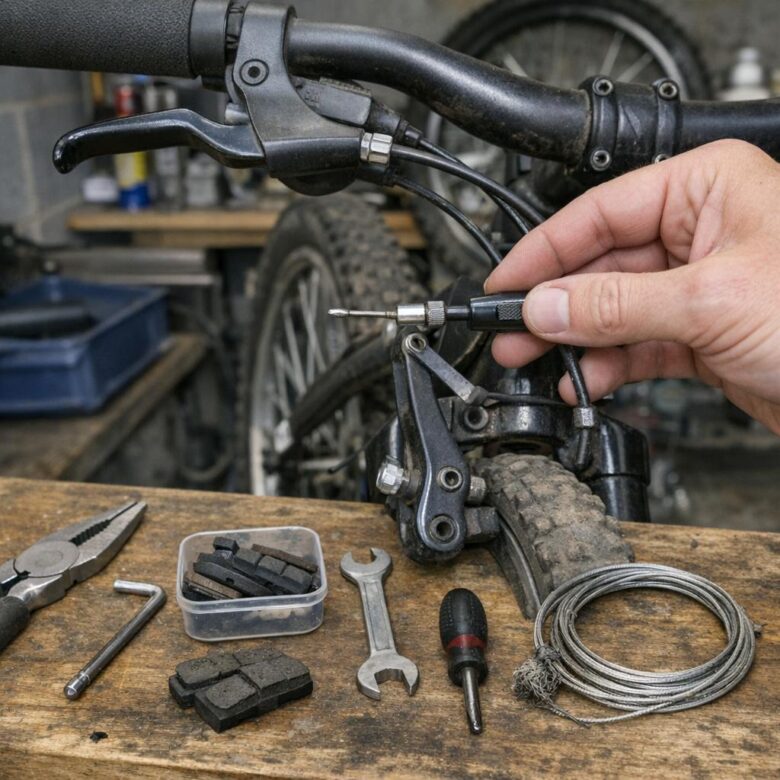
Start by putting the bike in a repair stand or flipping it carefully, then spin each wheel and watch where the brake rubs. A basic 5mm Allen key, cable cutter, and a Park Tool torque wrench make the job cleaner and help avoid stripped bolts, especially on disc brake calipers and carbon parts.
- Rim brakes: Loosen the pad bolt, align the brake pad with the rim braking surface, and keep it away from the tire. Add a slight “toe-in” so the front of the pad touches first; this often stops squealing on commuter bikes after wet rides.
- Disc brakes: For mechanical disc brakes, loosen the caliper bolts, squeeze the brake lever, then retighten the bolts evenly. For hydraulic disc brakes, check rotor alignment first; if the lever feels spongy, you may need a hydraulic brake bleed kit rather than simple adjustment.
- V-brakes: Use the barrel adjuster to fine-tune cable tension, then adjust the small spring screws on each arm until both pads move evenly. If one side sticks, clean the pivot post before assuming you need new brake parts.
Set lever travel so the brake engages before the lever reaches the handlebar, but do not make it so tight that the pads drag. In a real shop situation, a rider complaining about “weak brakes” often only needs fresh brake cables and correct pad alignment, which costs far less than a full brake replacement service.
After every adjustment, test the bike at walking speed before riding in traffic. Listen for rubbing, check stopping power, and confirm all bolts are tightened to the manufacturer’s torque specification.
Fixing Persistent Brake Problems: Rubbing, Squealing, Weak Braking, and Uneven Pad Wear
If your bike brakes still rub after a basic adjustment, check wheel seating first. A slightly crooked quick-release wheel can make perfectly good rim brakes or disc brakes feel “out of tune.” Open the skewer, press the wheel fully into the dropouts, tighten it securely, then spin the wheel and listen for contact.
For disc brake rubbing, loosen the caliper bolts, squeeze the brake lever firmly, and retighten the bolts while holding the lever. If the rotor still ticks once per wheel rotation, it may be slightly bent; a Park Tool rotor truing fork helps make small corrections without damaging the rotor.
- Squealing brakes: Clean rims or rotors with isopropyl alcohol, avoid touching braking surfaces, and replace contaminated pads.
- Weak braking power: Check cable tension, pad alignment, worn brake pads, and hydraulic brake fluid condition.
- Uneven pad wear: Re-center the caliper and confirm both brake arms move freely.
A real-world example: if a commuter bike squeals after being stored in a garage, the cause is often oil spray, chain lube, or road grime on the braking surface-not the brake adjustment itself. Cleaning is cheaper than replacing parts, but badly glazed pads should be replaced for safer stopping performance.
If braking still feels spongy on hydraulic disc brakes, a professional brake bleed service may be worth the cost. It usually requires the correct bleed kit, mineral oil or DOT fluid, and careful setup to avoid introducing air into the system.
Wrapping Up: Bike Brake Adjustment Guide: Common Problems and Easy Fixes Insights
Good brake adjustment is about confidence, not guesswork. If the lever feels firm, the pads contact cleanly, and the wheel spins without rubbing, you’re on the right track. Small tweaks can solve most braking issues, but don’t ignore warning signs like worn pads, frayed cables, leaking hydraulic fluid, or uneven stopping power.
Use each ride as a quick brake check: squeeze, listen, roll, and inspect. If adjustment doesn’t restore smooth, reliable braking, replace the worn part or visit a qualified mechanic. When in doubt, choose safety over saving a few minutes.

Dr. Sterling Brooks is a Doctor of Mechanical Engineering (PhD) and a high-performance cycling consultant. He specializes in bicycle kinematics and structural integrity, applying advanced engineering principles to simplify complex bike maintenance. His mission is to provide cyclists with the technical expertise needed to ensure their gear is as efficient and reliable as the athletes who ride them.